Our next Drop-In Art will be on Saturday, April 5, from 11AM – 3PM during Youth Art Day

Join us for our free Drop-In Art at Youth Art Day! – Perfect for families and children.

Drop-In Art Activities are organized by PCCA’s Drop-In Art Coordinator, Janice Bailor.

Newport High School

500 Caroline Street, Newport, PA 17074


Drop-In Art is an open time for families to create together!
Create up to 3 craft projects. Best suited for ages 3-12.
There is no charge for this activity thanks to our gracious sponsors.

Check out our upcoming Drop-In Art schedule!

Drop-in Art is made possible in part by the Greater Harrisburg Community Foundation: Benjamin Franklin Grant Opportunity 2023.
Past Projects

Accordion Folded Stars

Supplies needed:

Christmas paper or any paper of your choice – NOTE: Thinner paper works best for folding.

Scissors

Beads and charms

Cord, twine, or string

Glue stick or hot glue gun

Directions:

  1. Choose a piece of holiday patterned paper and cut in half.
  2. Accordion fold both pieces of paper from shortest end to shortest end.
  3. Fold the accordion folded strips in half to find the middle of each
  4. Place the center folds together and tie with an length of twine.
  5. Trim the ends of the folds as desired to create tips for your star.
  6. Bring the two loose sides of the paper folds together and glue to hold in place.
  7. Repeat for the remaining sides until each raw edge section is attached to the one next to it, opening the folds slightly until the star becomes round.
  8. Make sure the twine sticks up through the top of one section for hanging and enjoy!

Doily Paper Angels

Supplies needed:

Gold and white doilies

Scissors

Wooden beads

Glue/glue stick

cord/string

1/2 of a pipe cleaner, any color

Directions:

  1. Select a gold doily and fold in half.
  2. Make a small cut in the center of the fold.
  3. Choose a pipe cleaner and cut in half.
  4. Twist the pipe cleaner on one end to make a small knot and thread up through the gold doily. Glue the edges closed and set aside
  5. Fold two white doilies into quarters and glue the sides in place.
  6. Glue the white quarter doilies to the folded gold doily with the flat edges slightly over the flat top of the gold doily.
  7. Slide a wooden bead onto the pipe cleaner and position it at the top of the gold doily fold.
  8. Use your fingers and wrap the pipe cleaner into a twist that sits up off the top of the wooden bead to give the effect of a halo.
  9. Gently thread a 4-inch piece of twine through the halo and secure the ends of twin with a knot and enjoy your ornament!

Paper Poinsettias

Supplies needed:
Poinsettia template

Markers or pencils

Red/pink/ green cardstock

glue sticks

Colorful cardstock scraps

Scissors
Rhinestones/gems

Directions:

  1. Choose a piece of red cardstock and place the Poinsettia Template on the cardstock, trace and cut where indicated. Repeat for the remaining two size templates.
  2. Use a green cardstock paper and the corresponding leaf template to create the poinsettia leaves.
  3. Stack the red poinsettia pieces with the largest as the base and the smallest as the top. Secure all pieces together in the center with glue.
  4. Add the poinsettia leaves in a circular spray around the outside of the largest poinsettia securing at the back with glue.
  5. Decorate with an array of colorful rhinestones in the center (3/per flower, please!) and enjoy!

Fairy Garden Stakes

Supplies needed:
Floral wire
Colorful pony beads
Colorful assorted beads

Directions:

  1. Choose a floral wire to serve as the base of your stake and roll the top few inches into a flat spiral to cap the top.
  2. Choose several colorful beads and pony beads and thread them onto the straight end of the wire.
  3. When you have approximately 3-4 inches of wire left without beads, slightly crimp the straight end of the floral wire to prevent the beads from sliding off the end.
  4. Decorate a planter pot or garden nook and wait for the fairies to be dazzled!

Tissue Paper Marigold Crowns

Supplies needed:
Green tissue paper
Colorful tissue paper
Green pipe cleaners
Scissors

Directions:

  1. From an approximate 6in wide by length of tissue sheet paper, fold accordion pleats the entire length of the tissue.
  2. Make a fold in the center of the pleated tissue.
  3. Twist a pipe cleaner around the center fold secure it to the tissue paper.
  4. Using scissors, cut a small triangle jagged edges into the top of each side of the fold of tissue paper.
  5. Gently open the folds of tissue paper and fluff out the body of the marigold. Repeat for two more marigolds.
  6. Twist together the pipe cleaner stems of the marigold flowers to create a crown and secure to head with additional twists of the pipe cleaners.
  7. Cut out leaves from the green paper and twist in with additional pipe cleaners if desired.
  8. Pop on your fabulous marigold crown and enjoy!

Community Map String Art

Supplies needed:
Wooden map baseboard
Hammer and nails
Yarn/twine
Scissors

Directions:

  1. Using a piece of large plywood scrap, hammer in small nails in the outline of PA/Perry County.
  2. Community members attach string/yarn/twine to one nail and wrap in interesting patterns to other nails filling in the map with texture and color.

Find our virtual projects on YouTube and below. Be sure to subscribe to our channel so you don’t miss any videos!

Recycled Yogurt Tub Face Vase

Supplies needed:
Yogurt tubs and lid (small and large)
Colorful duct tape
Cotton balls
Craft or hot glue
Pipe cleaners (optional)
Scissors
Black permanent marker
Cardboard/cereal box
Colorful paper

Supplies needed:
Yogurt tubs and lid (small and large)
Colorful duct tape
Cotton balls
Craft or hot glue
Pipe cleaners (optional)
Scissors
Black permanent marker
Cardboard/cereal box
Colorful paper

Directions:
1. Cover the sides of your clean large yogurt tub with the colorful duct tape of your choice.
2. Glue two cotton balls on one side of the yogurt tub near the top opening to serve as eyes. Cover them in duct tape as well. Add details to the eyes, such as eyeballs, eyelashes and an outline with a black marker.
3. Cut a small triangle from cardboard and fold in half creating dimension. Cover the triangle in the duct tape leaving a piece to overlap and allow you to stick it onto the container to add the nose below the eyes.
4. Add a dab of glue and cotton ball to the backside of the triangle to hold the dimension and adhere to the face.
5. Use a red colorful duct tape or glue on construction paper to cut out lips and add them below the nose. Add additional details with additional tape, colorful paper or marker.
6. Create the base of your vase by covering the small yogurt tub with colorful duct tape and gluing to the bottom of your large tub face. Add details with additional tape, colorful paper or marker.
7. Fill a small amount of water into the open top of your face vase and pop in some small branches or flowers to create a fun hair arrangement!

Mix it Up Pop Art Collage

Supplies needed:
Cardstock (yellow, brown, black)
Scissors
White cardstock
Craft or glue stick

Directions:
1. Cut thin strips of black cardstock to serve as the bold outline of the paper collage design.
2. Arrange the black cardstock strips to form the outline of a bowl with a wider top, smaller base and angled sides. Adhere all strips with glue.
3. Create the spoon shape with a long strip of black paper pointing at an angle into the bowl. Angle the small strips of black paper slightly to create a spoon shape. Cross the small strips of the spoon into the bowl for interest.
4. Create the splatters from the bowl by angling several small strips on either side of the bowl and spoon.
5. Use small paper strips to fill in the black outlines with tiles of color in both the bowl and spoon.
6. Use small paper strips to add the phrase “mix it up!” is desired.

Your pop-art-inspired paper collage would be a cute addition to a kitchen area or as an invitation to a baking party!

No Sew Apron

Supplies needed:
Cotton dish towel
Flat ribbon (grosgrain or similar)
Hot glue or strong craft glue
Iron stitch witchery or fabric glue
Scissors

Directions
1. Heat up an iron to a medium to hot setting and iron your cotton dishtowel. *Ask an adult helper to work with you on this project.
2. Using the iron, fold in the top two corners of the dishtowel to an approximate 30-degree angle.
3. Trim away the excess fold, leaving about 1in of the towel. Fold the cut edge over twice to enclose the raw edge. Add stitch witchery or strong fabric glue to the fold to hold it in place.
4. Add a loop of flat ribbon to the angled top to create the top strap with the hot glue/stitch witchery/ fabric glue. Measure what would easily slide over your head for the length to cut.
5. At the larger end of the angle, add a length of ribbon to either side with the hot glue/stitch witchery/ fabric glue. These will be the waist ties. Measure yourself to see what works best before cutting the ribbon.

Enjoy cooking in your new no-sew apron!

Pipe Cleaner Daffodil Basket

Supplies needed:
Orange, green and yellow pipe cleaners
Scissors
Green shredded paper
Craft or hot glue
Sequins (optional)
Berry basket or similar

Directions:
1. Take three yellow pipe cleaners and fold them in half.
2. Join each of the pipe cleaners together in the middle by overlapping and twisting them together.
3. Beginning at the end of each branch of the pipe cleaner, roll the tip toward the center in a flat snail coil. Repeat for all six branches/petals of the daffodil.
4. Fold the orange pipe cleaner in half and overlap and twist into the center of the daffodil petals. Pull both ends of the orange pipe cleaner straight up.
5. Use your fingers to coil the orange pipe cleaners into the central spiral of the daffodil by wrapping the pipe cleaner around your fingers several times.
6. Take your green pipe cleaner and attach it to the daffodil top by twisting it over the central petal unit several times. Repeat to create a cluster of daffodils.
7. Create a small bend at the bottom of the green stem and adhere with glue to the bottom and sides of the berry basket.
8. Fill the basket in around the daffodil stems with green shredded paper or fake grass. Set your cute daffodil basket out on the table for a festive pop of spring!

Clay Coil Heart

Supplies needed:
Air dry clay or similar
White paper
Marker
Non-stick work surface

Directions:
1. Using the white paper, draw the outline of a simple heart shape to the desired size.
2. Tear off a section of the air dry clay and roll out into a long rope.
3. Use the clay rope to outline the shape of the drawn heart.
4. Create additional lengths of clay rope to fill in across the interior of the heart. 5. Add more texture with the clay by rolling up small balls and adding them in between the rope areas to fill up the heart. Experiment with different shapes and textures of clay until the entire interior is full.
6. Set aside and allow to dry. Paint with craft paint if desired.

Gift your incredible clay heart and make someone smile for Valentine’s Day!

Judy Bouder Inspired Paper Collage

Supplies needed:
Cardstock
Scissors
Textured paper
Craft or glue stick
Paint/markers
Paint brush (optional)
Flower magazine clippings

Directions:
1. Create the base of the paper collage background by adding texture to the cardstock with either small dots and dashes of paint or marker.
2. Cut a circle from the textured paper and rough up the edges by running the blade of the scissors along the cut edge.
3. Add the textured paper circle to the background allowing space to add other collage elements.
4. Use a magazine to find one large or several small images of flowers, leaves or branches and cut out.
5. Adhere the floral collage elements coming out of the circle or overlapping it.
6. Add additional texture and movement around the collaged elements with more paint or marker as desired.
7. Enjoy your beautiful paper flower collage or give as a lovely handmade gift!

View the work of Judy Bouder and get more inspiration online at http://www.perrycountyarts.org/exhibitions.

🍬 Felt Peppermint Ornament 🍬

Supplies needed:
Red and White felt
Scissors
Twine or yarn (white)
Craft or hot glue
Sequins (optional)

Directions:
1. From the white felt, cut the base of the peppermint shape. Either cut a large circle, or a circle with small triangles connected off either side like the wrapper of a candy.
2. Use the red felt to cut small triangles and apply them using glue to the circle area of the white base felt in an alternating wedge pattern. Allow to dry.
3. Add sequins in matching colors to the red and white wedges of the peppermint for a bit of sparkle if desired.
4. Add a piece of ribbon for hanging and enjoy your cute candy ornament! 🍬

🎄 Felt Circles Christmas Tree Ornament 🎄

Supplies needed:
Colorful felt
Scissors
Needle and thread
Star button/sticker (optional)

Directions:
1. Begin by cutting an assortment of circles from the felt sheets. Cut some larger and graduate down to a smaller size, creating each circle progressively smaller as you go.
2. Stack the circles from largest to smallest to create a cone shape similar to a traditional pine tree used for Christmas.
3. One by one, thread the circles together in the cone shape using the needle and thread to connect them together.
4. Thread on a felt star or button. A foam shape or sticker may also be used as a tree topper if desired.
5. Leave a tail of thread for hanging.
6. Enjoy your cute felt Christmas tree! 🎄

🕯️ Felt Candle Ornament ✨

Supplies needed:
Colorful felt
Scissors
Twine or yarn (white)
Craft or hot glue

Directions:
1. Create the base of the felt candle using a dark felt. Cut a slightly tapered stick shape with a circle on the top.
2. Chose a color of felt for the candle and cut a stick shape approximately 1/8 in thinner than the felt base. Glue it in place and allow to dry.
3. Create a small circle to fill the circle shape on top of the felt base from white felt and glue in place leaving a slight border around that shape as well.
4. Create a flame shape from yellow felt and add to the center of the circle just above the candle shape to complete the burning candle ornament. Secure with glue and allow to dry.
5. Enjoy your beautiful candle ornament or give as a lovely handmade gift! 🕯️✨

Natural Stick Spider Web

Supplies needed:
Large straight sticks
Scissors/craft knife
Twine or yarn (white)
Plastic spider

Directions:

  1. Gather three medium to long and straight sticks from outside. Ask before you take!
  2. Overlap two sticks and tie together with a long length of yarn at the center to make a cross shape upon which to weave.
  3. From the center, weave the yarn over and under the first two sticks a few times until they are firmly joined.
  4. Add the third stick in a diagonal across the center and wrap until it is also firmly held in place.
  5. Continue weaving over and under with the yarn across all stick forms allowing the distance of thread to become longer as you reach the edges.
  6. Leave an approximate four inch length of yarn so you can hang the web up.
  7. Add a plastic spider to the web.
  8. Enjoy your little spooky spider web by hanging it up for Halloween! 🕸️🕷️

Paper Plate Animal Mask

Supplies needed:
Paper plate
Scissors/craft knife
Masking tape/duct tape
Acrylic paint
Permanent marker
Straw
Construction paper

Directions:

  1. Begin by cutting a paper plate in half across the radius.
  2. Hold the half plate up to your face and mark approximately where your eyes fall on the plate.
  3. Using your scissors, carefully cut out two eye holes.
  4. Decorate your plate by painting and adding pieces of paper to create a lion, fox, bear, or other animal of your choosing. Construction paper can be cut into circles or triangles and added to the top edge of the plate for ears. Strips of paper can be added to create whiskers and other basic shapes can be used to create a nose or other facial elements.
  5. After your mask has dried, tape a straw to the back of your mask on one side for holding.
  6. Enjoy your mask for Halloween or a fun pretend session!

Air Dry Clay Leaf Dish

Supplies needed:
Air dry clay knife
Leaf
Acrylic paint
Brush
Mod Podge

Directions:

  1. Begin by collecting a large leaf from your yard. Ask before you pick!
  2. Tear off a chunk of air dry clay and roll it out like a cookie to about 1/4in thickness and slightly larger than the leaf.
  3. Firmly press the leaf, rough side down into the rolled out clay until the leaf design is imprinted.
  4. Cut around the outside of the leaf and peel it off. Ask your adult helper to assist with trimming.
  5. Use your fingers to gently push up the edges of the leaf to create a lip all the way around the edge. Allow to dry.
  6. Add colored acrylic paint and seal with Mod Podge if desired.
  7. Enjoy your beautiful leaf dish or give as a lovely handmade gift!

Amate Bark Inspired Canvas

Supplies needed:
White/blue cardstock
Scissors
Colorful paper
Straw
Glue
Picture/magazine image
Colorful paints
Paintbrush
Plastic wrap (optional)

Directions:
1. Using the white or blue cardstock as the canvas, apply a layer of paint to create a background of ocean waves or similar water texture. Allow to dry.
2. Cut out an image of a face from a magazine or old photograph and set aside.
3. Create a snorkel mask by cutting out a large oval that is roughly the size of the face you have chosen. Leave an approximate ½ inch and cut out the interior of the oval to create a frame.
4. Flip the oval to the wrong side and add a layer of plastic wrap to create the lens of the snorkel mask.
5. Apply the face image to the painted background canvas.
6. Add the snorkel mask to the face over the eyes and glue in place. Add a straw coming off the side of the mouth toward the top of the painting to create the look of the snorkel tube.
7. Add additional details such as painted or paper cut fish to enhance your snorkel mixed media painting.

3D Coral Reef Egg Carton

Supplies needed:
Colorful tissue paper
School/craft glue
Egg carton
Watercolors/markers
Scissors
Colorful pipe cleaners
Washi tape/small rubber bands
Scrap paper

Directions:
1. Fill each egg compartment of the egg carton with a piece of colorful crumpled tissue paper.
2. Use additional tissue paper to twist or cut into fringe to create coral shapes and adhere to the tissue paper compartments. Use washi tape or small rubber bands to hold twists and fringe in place or add additional textures.
3. Create small fish shapes, color or paint and cut out.
4. Tape or glue the fish to the top of pipe cleaners to create a swimming effect and attach to the crumpled egg carton paper and coral to complete the reef.

Amate Bark Inspired Canvas

Supplies needed:
Paper bag
Black marker
Colorful paints
Paint brushes
White gel pen (optional)
Pencil

Directions:

1. Open your paper bag at the seams to create a flat sheet. Then crumple the bag to form an even texture and smoothen flat. 2. After preparing your paper bag canvas, use a pencil to sketch in traditional amate bark painting images that represent Latin American culture, such as beautiful tropical flowers, leaves and birds.
3. Outline your drawings with black marker for a bold look. Fill in with colorful paints as desired and allow to dry.
4. Add an additional detail and highlights with a white gel pen or white paint.
5. Learn more about the Amate bark paintings and Latin American culture by visiting this education website: https://rammcollections.org.uk/object/27-2003-1/

Luau Party Live on ZOOM!

Friday, June 25, 10 a.m.

Hibiscus/Tropical Leaf Headpiece

Supplies needed:
Paper plates
School/craft glue
Punched dots/stickers
Watercolors/markers
Scissors
Headband
Masking tape

Directions:

  1. Cover four paper plates with watercolors in an ombre effect. Add splatters for additional details if desired. Allow to dry.
  2. Cut the paper plates into five to six petal flowers or large leaf shapes by slightly scalloping the edges. Make each plate flower/leaf slightly smaller as you work inward.
  3. Use a pencil or marker to wrap the petals around and slightly curl them upward.
  4. Layer all of the plates on top of one another in descending size and glue in place.
  5. Add dot details to create the center of the flower.
  6. Attach your hibiscus flower to a headband by securing the underside to the headband and enjoy your beautiful floral crown.

Pineapple Luminary Jar

Supplies needed:
Green fun foam
Scissors
School glue
Glue dots
Black marker
Sponge brush
Green and yellow tissue paper
Glass jar with lid

Directions:

  1. Cut up the green and yellow tissue paper into squares.
  2. Apply a thin layer of green tissue squares to the jar lid using the school glue and sponge brush. Allow to dry.
  3. Apply a thin layer of yellow tissue squares to the exterior of the glass jar using the school glue and sponge brush. Allow to dry.
  4. Cut out several long, pointy ended ovals from the fun foam to create the pineapple leaves for the jar lid. 
  5. Snip the bottom of the leaf apart about a half inch to create an area to flatten onto the jar lid and adhere with several glue dots so the leaves stick up from the base of the lid.
  6. Add small asterisks or cross marks to the dry layer of yellow tissue on the jar for additional pineapple detail effect.
  7. Insert a tea light (with help of an adult) or battery powered luminary and enjoy the hospitable glow.

Tiki Paper Roll Statues

Supplies needed:
Toilet paper/paper towel roll
Black marker
Colorful markers

Directions:

  1. Using a black marker, add large eyes near the top third of the paper roll to begin forming the tiki face. Remember tiki gods were very powerful and stern and made to represent power when drawing your face details.
  2. Below the eyes, use the marker to add a prominent nose outline.
  3. Under the nose, add a large outline of mouth with teeth.
  4. Add additional line details to the face roll if desired.
  5. Color in the outlines of the facial features with markers if desired.
  6. Create a collection of tiki statues to represent power and good luck for your summer.

Learn more about the importance of tiki statues to the Hawaiian culture by visiting this education website: https://www.to-hawaii.com/tikis.php

3D Pop Up Butterfly Card

Supplies needed:
Colorful paper
Scissors
Glue stick
Colorful markers (optional)

Directions:

1. Begin by selecting a colorful piece of paper to serve as the base of your card and fold in half.
2. Choose another colorful piece of paper and fold in half. Draw a large, scalloped shape or half heart with an additional bump on the bottom on the one side of the fold.
3. Make sure to have your drawing touch at the fold and cut out leaving the fold intact.
4. Cut a strip of paper approximately 1 inch and use a pencil or your fingers to slightly curl it at one end.
5. Place the scalloped fold with one side on the card base and glue in place, allowing the other side to pop up from the card base. This is the winged part of your butterfly.
6. Add the curled strip next to the butterfly body. Decorate with face details if desired.
7. Add additional details to your card background and butterfly with more paper or colored marker details.

Rainbow Cloud Windcatcher

Supplies needed:
White paper plate
Cotton puffs
School/craft glue
Scissors
Colorful streamers or tissue
String stapler

Directions:

1. Fold your paper plate in half to create a half circle.
2. Add colorful streamers or strips of tissue paper to the open edge of the folded plate and secure in place with glue.
3. Cut out several raindrop shapes and glue them around the ends of pieces of string. Add the string ends to the streamer line on the paper plate and secure in place.
4. Staple or glue the plate closed on the streamer and raindrop end.
5. Apply loose puffs of cotton with school glue to the paper plate to create the cloud effect.
6. Add a piece of string to the top of the cloud to hang and enjoy!

Fringed Felt Monster Pencil Topper

Supplies needed:
Strip of felt or cardstock
School/craft glue
Google eyes
Pencil/pen
Scissors

Directions:

1. Cut a 1-1/2 inch strip from the long side of a piece of colorful cardstock or felt sheet.
2. Using your scissors, create a fringe on one side of the strip by making tight cuts along the one edge, but cutting the whole way through the paper strip.
3. Roll the strip of fringed paper around the end of your pen or pencil with the fringe hanging slightly over the tip end of the pen/pencil and secure in place with glue.
4. Add google eyes to the wrapped paper to create the silly face of your fringe topper and enjoy!

Thom Kulp Grid

Supplies needed:
White cardstock
Black pen/marker
Ruler
Colorful markers/pencils
Colorful paper
Glue stick

Directions:
1. Using the white cardstock background, black marker and the ruler create a large grid covering most the of paper.
2. Apply color in several blocks of the grid using the markers or pencils of your choice. Be sure to stay within your gird lines as you work.
3. In other blocks, add some circles of color in rows and columns.
4. In different blocks add squares or rectangles of paper.
5. Continue to play with the grids and fill in areas of color or pattern until you have created your grid artwork. Play with positive and negative space, color position and density of print.

Explore Thom’s Artwork

Butterfly Ring

Supplies needed:
Colorful pipe cleaners
Scissors

Directions:

1. Begin by selecting two colorful pipe cleaners that are 12 inches in length and one neutral colored pipe cleaner that is 6 inches in length.
2. Take the two longer pipe cleaners and twist them around each other a few times in the center.
3. Place the middle of the twisted pipe cleaners around your finger and gently twist it around at the top to create the ring.
4. Spread the four ends of the pipe cleaners out from the top of the ring twist spacing them evenly apart.
5. Decide on which color will be the top set of wings and which will be the bottom set of wings. Snip about a half inch to an inch from your bottom wing pieces.
6. Begin with one end of the pipe cleaner at the top set of wings and begin to spiral the pipe cleaner around itself until you reach the center of the ring. Continue with each wing.
7. Gently pinch each spiral to create a shaped wing.
8. Wrap the neutral colored pipe cleaner around the center of the ring where all of the wing pieces meet and twist together at the top to create the antennae.
9. Curl down the antennae slightly if desired and enjoy your beautiful hand sculpted butterfly ring!

Handprint Flower

Supplies needed:
White cardstock
Markers
Glue/tape
Scissors
Straw or stick

Directions:
1. Trace your hand onto the white cardstock.
2. Color in your hand shape using the markers.
3. Create two leaves for your flower by drawing a squashed oval shape and color in accordingly.
4. Cut out both the hand flower and the leaves.
5. Attach the colored handprint flower at the top end of your stick or straw with glue or tape. Affix the leaves toward the center of the stick with glue or tape.
6. Make several handprint flowers and enjoy a beautiful bouquet!

Heller Keller Inspired Braille Art

Supplies needed:
White cardstock
Water soluble markers/paint
Braille alphabet
Sticky rhinestones/foam circles

Directions:

1. Select several colors of paint or markers and have them easily within reach. Set your blank white cardstock canvas on the table in front of you and close your eyes.
2. Choose a marker or dip your fingers into the paint with your eyes closed and feel for the canvas.
3. With your eyes still closed, begin to fill up the canvas using only your sense of touch. Repeat adding additional marker or paint colors until you feel your canvas is complete.
4. Open your eyes and see the creative background you have made using only your sense of touch. Allow your painting to dry.
5. Print out the Braille alphabet and find the patterns for the letters of your name.
6. Using the rhinestones or small foam circle stickers, spell out your name in Braille on top of your abstract background.
7. Proudly display your Braille alphabet art!

Learn More About Helen Keller

Pigeon and Duckling Puppets

Supplies needed:

Blue and yellow markers
Blue and yellow muffin wrapper
Popsicle sticks
Google eyes
Blue, yellow, orange and white construction paper
Glue
Scissors
Black marker

Directions:

1. Begin by two small circles from both the blue and yellow construction paper.
2. Adhere each circle to the top of a popsicle stick.
3. Color each popsicle stick with the coordinating marker color from the bottom of the paper circle to about halfway down the stick.
4. Fold one each of the coordinating color muffin wrapper in half and glue about halfway down the popsicle stick with the flat folded edge facing toward the paper circle head.
5. Add additional face details with a small triangle of orange for a beak and white circle with black center dot for an eye to the circle.
5. Enjoy reenacting the silly anticks of Pigeon and Duckling from the Mo Willems books with your puppets.

“Stained Glass” Bookmark

Supplies needed:

White cardstock
Colorful tissue paper
Paintbrush
Mod podge
Scissors
Ribbon/trims (optional)

Directions:

1. Cut a rectangle 2-in. x 6-in. from the white cardstock.
2. Cut up small pieces of colorful tissue paper and set aside.
3. Lay the rectangle on a piece of paper and spread the top with a light coat of mod podge.
4. Begin arranging your pieces of tissue paper to cover the entire top of the rectangle. Allow to dry.
5. Put a thin layer of mod podge over the entire top of the tissue paper layer to protect it and allow to dry.
6. Use a hole punch to make a hole near one of the short ends of the rectangle if you want to add ribbon or trim.
7. Thread ribbon through hole by making a loop at the halfway point and feeding it through the hole. Pull the loose ends of ribbon through to secure the loop.
8. Enjoy your new bookmark to save your place as you read!

Cardinal Handprint

Supplies needed:

Blue construction paper
White, red and black paint
Paintbrush
Brown construction paper
Snowflake stamp/stickers
Glue s
Scissors

Directions:

1. Begin by cutting long branch shapes from the brown construction paper.
2. Adhere them to the blue background paper with the edge of the papers lined up. Be sure to leave room to stamp the cardinal image.
3. Paint your hand with red paint and carefully print your hand, thumb side up, over the branches as many times as you would like to create a flock of cardinals in the tree.
4. Add details such as the cardinal’s eye and legs using the black paint.’
5. Add snow by painting soft stripes on top of the brown paper branches.
6. Add additional snow details with snowflake stickers or stamps to complete the scene.
7. Enjoy adding this beautiful winter painting to your home.

Monster Mitten

Supplies needed:

Single mitten/glove
Thread and needle
Buttons/beads stuffing
Scissors
Felt/trims (optional)

Directions:

1. Gather a mitten or glove that no longer has a match.
2. Select a few buttons to sew on approximately ¾ to 1 in down from the wristband. Reach your needle and thread into the inside of the mitten and be careful not to sew the two sides together.
3. Add any additional felt or trim details for a mouth by sewing them in place beneath the buttons.
4. After you have added all of the face details desired, begin stuffing the finger areas with stuffing to the top of the wrist band.
5. Sew the two sides of the glove/mitten together at the wristband to enclose the stuffing of your monster. 6. Enjoy your new mitten monster masterpiece!

Alma Woodsey Thomas Inspired Heart Art

Supplies needed:

White cardstock
Water soluble markers/paint
Pencil/pen

Directions:

1. Draw a medium sized heart shape in the center of the white cardstock background.
2. Fill in the heart with paint or markers of your color choice. Use something bright and bold.
3. Begin working outward from the heart center making a ring of dashed paint strokes or small rectangles using one color per ring. Experiment with having multiple rows of the same color, ombre effects and bright contrasting colors as part of your rows.
4. Continue working outward with your colorful rows until you have filled up the entire background with lovely dashes of color just like abstract artist Alma Woodsey Thomas.

Learn About Alma Woodsey Thomas

Coffee Filter Hands Across the Globe

Supplies needed:

Coffee filter
Water soluble markers
Scissors
Craft or school glue
Brown and red paper
Pencil/pen
Spray bottle with water
Tray

Directions:

1. Choose a white coffee filter and color large blocks of blue and green to represent the water and land of earth.
2. Place the marker covered in a tray and spray filter with water and allow the colors to swirl together. Set aside to dry.
3. Fold a piece of brown construction paper in an accordion fold.
4. Draw a basic outline of a paper doll on one side. Cut out the dolls allowing the hands to stay connected by the paper’s fold in the center.
5. Adhere the paper doll line across the center of the dried coffee filter world and add a heart in the center of the line if desired.

Learn About Citizenship

Watercolor Splatter Polar Bear

Supplies needed:

White cardstock
Black marker
Scissors
Bear cutout template
Watercolors and water
Straw

Directions:

1.Print and cut out the polar bear shape template.
2. Lay the polar bear shape on top of your white cardstock background paper and secure in place with a small piece(s) of washi tape in a loop on the back. Lightly trace around the shape with a pencil and remove the cut out and set aside.
3. Using the outline, add a puddle of watercolor to the outside of the pencil line and use your straw to blow the puddle outward from the polarbear shape.
4. Repeat adding puddles of watercolor and blowing splatters around the entire perimeter of the shape. Add additional watercolor splatters in the corners of the painting if desired.
5. Wet your paintbrush with a generous amount of paint and tap lightly over the canvas using the straw to splatter droplets of watercolor on top of the canvas.
6. Set splatter painting aside and allow to dry.
7. Add cutout shape back on top of the painting where the pencil outline was or trace your pencil shape with marker to define the polar bear subject.
8. Enjoy your icy bear masterpiece!

Virtual Holiday Ornament Party

Bottle Cap Snowman Ornament

Supplies needed:

White paint
Black marker
Orange marker
Button
Craft glue/hot glue
Scissors
Twin/ribbon
Paintbrush

Directions:

  1. Choose three bottle caps and paint the interior (and exterior if you choose) with white paint. Allow to dry.
  2. In the interior of one cap make two dots for the snowman’s eyes and three in a row for the snowman’s mouth using your black marker.
  3. In between the black dot eyes and mouth, add an orange line or small triangle for the snowman’s carrot nose using the orange marker.
  4. In the interior of another bottle cap, make three dots in a straight line going vertical for the buttons on the snowman’s chest.
  5. Glue the chest cap below the face cap making sure to position the buttons going perpendicular to the face.
  6. Add the plain white bottle cap to the bottom of the button cap with glue. Allow all to dry.
  7. Create a scarf for your snowman by tying a piece of yarn, twine or ribbon around the junction of the face cap and chest cap of the snowman. Add a button detail if desired.
  8. To hang the bottle cap snowman, create a loop with a piece of twine or ribbon and secure to the center back of the snowman head with glue. Allow to dry.
  9. Hang your cute bottle cap snowman on the Christmas Tree and enjoy!

Recycled Christmas Card Ornament or Garland

Supplies needed:

Christmas cards (or cardstock)
Large cap (to trace)
School glue
Scissors
Pencil/pen
Twin/ribbon

Directions:

  1. Select some colorful old Christmas cards or cardstock and trace a large bottle cap circle on the back and cut out. Repeat for a total of six circles per “ball.”
  2. Fold all circles in half.
  3. Glue one folded half of one circle to another one half of another circle. Repeat for all six circles, making three sets of two circles each. Allow to dry.
  4. Glue one set of two circles to another set of two circles at one folded half circle. Repeat for the remaining circle group.
  5. Before connecting the final half circles, add a length of ribbon or twin against the spine of the circles and adhere with glue. If you are making only an ornament, tie a small knot at the bottom end and a small loop at the top for hanging. If you are making a garland, no knots are needed until you have repeated steps 1-4 for your desired length of garland.
  6. Connect the final half circles with glue and allow to dry.
  7. Display your beautiful recycled Christmas card ornament or garland on your Christmas Tree.

Fun Foam Dala Horse

Supplies needed:

Colorful fun foam
Dala horse template
Scissors
Twine/ribbon glue

Directions:

  1. Begin your folk-art Swedish Dala Horse by tracing the horse template on to the back side of a rectangle of fun foam and cut out the outline.
  2. Cut out a half circle shape and adhere it to the center back of the horse to create the sadle.
  3. From the front of the saddle around to the front neck of the horse and from the bottom of the saddle to the bottom of the belly of the horse, add a small strip of fun foam to form the straps of the saddle.
  4. Add additional smaller pieces of fun foam layered on top to create a pattern detail on the saddle and straps.
  5. Make the Dala horse’s hair by cutting out a simple scalloped line and adhering it to the back neck area of the horse.
  6. Add additional smaller pieces of fun foam layered on top to create a pattern detail on the hair.
  7. Add a small loop of thread or twin to the horse at the center back to hang and enjoy!
Learn More About the Swedish Dala Horse Tradition

Leaf Garland

Supplies needed:

White coffee filters
Spray bottle
Water
Water-based markers
Hole punch
Scissors
Twin/ribbon
Tray (optional)

Directions:

1. Choose several white coffee filters and flatten them out.
2. Apply scribbles of water-based markers all over the coffee filter.
3. Spritz colored coffee filters with water in your tray and allow the colors to blend together. Set aside to dry.
4. After the colored coffee filters have dried, cut simple leaf shapes. You can use a leaf from your yard as a template, or just cut simple pointed oval shapes.
5. Using the hole punch, punch holes toward the end of your leaf cutouts.
6. Thread your filter leaves onto your twin or ribbon.
7. Hang your beautiful garland of leaves from your mantel or across an area of wall or door and enjoy!

Owl Puppet

Supplies needed:

Black, yellow, orange and brown construction paper
Large google eyes or black buttons
School glue
Scissors
Pencil/pen
Dried leaves (optional)

Directions:
1. Lay your paper bag on a table with the bottom fold of the bag facing up.
2. Cut a large black triangle from construction paper and adhere to the top fold of the paper bag bottom.
3. Cut a small triangle of yellow paper and glue in place at the bottom of the black triangle for the owl’s beak.
4. Cut a large oval from brown construction paper and adhere to the center of the bag for the owl’s stomach feathers. Fill in with feather details if desired.
5. To create the owl’s wings, eighter glue collected leaves, or fan shaped pieces of brown paper to either side of the paper bag in line with the stomach oval.
6. Cut small triangles for the feet of the owl. Add talon details by cutting into the long edge of the triangle two smaller triangles. Adhere the triangles to the bottom edge of the bag.
7.Complete the owl’s face by adding black buttons or large google eyes to either side of the beak area on the bottom flap.
8. Insert your hand into the bag and flap away with your owl!

Clementine Hunter Landscape

Supplies needed:
White cardstock
Acrylic paint or markers

Directions:
1. Begin your folk art landscape by coloring or painting the ground across the lower third of you piece of paper in a soft wave to create the look of hills.
2. Off to one side add a large square or rectangle as the basic shape of a house. Add a triangle in a darker color at the top for the roof. Continue adding basic house details such as door and windows as desired.
3. Add a few simple tree shapes to the landscape by drawing upright strokes of brown or black and adding loose oval or circular shapes in your choice of leaf colors at the top.
4. Add a farmer or family in the fields by creating a basic face and head of a person and adding a simple body. You can also add a simple horse, basket, or cart shape if desired.
5. Display your beautiful piece of Clementine Hunter inspired Folk Art.

Learn More about Clementine Hunter

Sweater Kitten

Supplies needed:
Recycled cardboard packaging
Pen/pencil/ black marker
Scissors
Twine, cord, yarn
Masking tape

Directions:
1. From a piece of thin cardboard packaging such as a cereal box, sketch out a circle head, pointy ears and wide rectangular body. Cut out.
2. In the center of the large rectangular body, cut two parallel notches to make a smaller rectangle. Do not cut all the way to the head. This piece will be bent backward, allowing the cat to stand up.
3. Add facial details to your cat with maker.
4. Tape a length of yarn to the back of the cat and begin wrapping the body of the cat around with yarn to form the cat’s sweater. Take care to wrap under the notch flap so the cat can still stand up.
5. Continue wrapping until your cat has a lovely full sweater. Secure the end of the yarn to the bottom of the cat cutout with an additional piece of tape.
6. Set your lovely maintenance free pet next to your work area and enjoy the quiet companion!

Kandinsky Tree

Supplies needed:
Colorful papers
School glue
Pencil/pen
Black and blue paper
Scissors
Circle templates, optional

Directions:
1. From the black paper cut out a large tree trunk shape by either using your traced hand and forearm as a template or drawing a free form trunk shape from memory.
2. Glue the black trunk to the center of the blue background paper.
3. Cut a variety of large circles from colorful paper. You can either free hand cut the circles or use jar lids to trace and cut circle shapes.
4. Adhere with glue the larger circles to the top of your tree trunk in various spots.
5. Next, cut a variety of mid-sized circles and layer them on top of your larger circles.
6. Finally, add a variety of small circles to the top of your circle collages to complete the Kandinsky layered concentric circle effect.
7. Display your abstract art concentric circle tree proudly on your art display board.

Learn More about Vasily Kandinsky

Romare Beardon Collage

Recognized as one of the most creative and original visual artists of the twentieth century, Romare Bearden had a prolific and distinguished career. He experimented with many different mediums and artistic styles, but is best known for his richly textured collages, two of which appeared on the covers of Fortune and Time magazines, in 1968. An innovative artist with diverse interests, Bearden also designed costumes and sets for the Alvin Ailey American Dance Theater, and programs, sets and designs for Nanette Bearden’s Contemporary Dance Theatre.

~ Romare Beardon Foundation

Supplies:
Blue construction paper
Markers or crayons
Scissors
Craft or school glue
Paper and magazine scraps

Directions:
1. Begin with the sheet of blue construction paper as the base/background of the collage. Cut out several colorful pieces of paper or magazines in large rectangles and adhere in a wonky row about 1/3 up from the bottom of the blue base paper. These are your buildings.
2. Add additional layers of cut papers or details with markers/ crayons to embellish and design the buildings.
3. Cut a long rectangle to lay across the bottom portion of the background paper horizontally to create the street in front of your buildings. Add additional details with more paper scraps or markers/crayons.
4. Cut out several images of people, animals, vehicles, etc. from magazines and add “characters” to your street. If you don’t have magazine images, create the “characters” from basic paper scraps and add details with markers/crayons.

Hedge Hog Planter

Supplies needed:
Clean soda bottle
Colorful yarn/twine
Scissors/craft knife
Hot glue/craft glue
Black permanent marker
Google eyes/black buttons
Soil and plants (optional)

Directions:
1. Using scissors or a craft knife, cut a large rectangle about the length of the soda bottle and about 1/3 width to create the planting pocket. If you do not wish to make a planter skip this step.
2. Begin at one end of the soda bottle and glue the tail end of your yarn or twin into place. Begin wrapping the twin/yarn around the bottle, securing as necessary with glue to hold in place. If you have made the planting hole, wrap up to, but not over the hole. Cover the bottle with wrapped twine.
3. Color the bottle cap with black marker to create the hedgehog’s nose and affix to the bottle top.
4. Glue in place google eyes or buttons above the nose area to create the hedgehog’s face. Make sure the planting opening is facing up, if applicable.
5. Fill the body opening with soil and add some plants to complete your hedgehog planter.
6. Set them in a sunny location and enjoy into the winter.

Apple Magnet

Supplies needed:
Popsicle sticks
Black marker
Scissors
Hot glue/craft glue
Red, brown and green paper
Magnet

Directions:
1. Create the apple center by lining up four popsicle sticks in a row and gluing them together with a strip of paper across the back. Secure the magnet to the back of the sticks as well.
2. Cut a medium circle from your red or green paper and cut the circle in half to make the two ends of the apple. Add a scalloped cutting detail to the flat edge of the half circle, if desired.
3. Using the green paper, cut a small oval for a leaf. Use the brown paper to cut a small rectangle for the apple stem and adhere both to the top of your apple core.
4. Add seed detail to the center of the sticks using a black marker.
5. Use your cut apple magnet to display a favorite autumn photo or school paper.

Sun Mask

Supplies needed:
Colorful markers or paint in yellow and orange
Yarn
Scissors
Hole punch
Paper plate

1. Cut the interior flat portion of the paper plate out to leave just a ring.
2. Apply a coat of yellow and orange paint or color with markers until the entire ring has been filled in. Allow to dry if necessary.
3. Using a hole punch, create two holes on opposite sides of the paper plate ring about a ½ in in from the edges.
4. Create “rays” of your sun by cutting approximately 1-inch wide angled sections of the plate toward the center, make sure to leave about an inch fully attached toward the center ring of the plate.
5. Add yarn to the holes in the opposite sides and secure the sun mask around your head with your face poking out from the center opening.
6. Shine on! 🌞

More Drop-In Art @ Home Projects!

April

Paper plate llama
Spheres in space collage

HAVE ANY EXTRA, UNUSED ART SUPPLIES?

Consider making a donation to our art room. We can organize and use your supplies for future drop-in art projects and for Buffalo Kids Arts & Crafts at the Little Buffalo Festival. Please contact engage@perrycountyarts.org to arrange your donation.

SPECIFIC NEEDS

Small glass jars with lids for the snow globe project
Leftover white tiles for the Aurora project
Old fleece  and stuffing for the monsters
Larger soda or milk bottles for animal planters

MAKE IT AGAIN AT HOME!
DROP-IN ART GALLERY

In-person Drop-In Art sessions have been canceled until further notice in response to the coronavirus pandemic. Please join us online for Drop-In Art @ Home! Find the YouTube links below and be sure to subscribe so you don’t miss any videos.

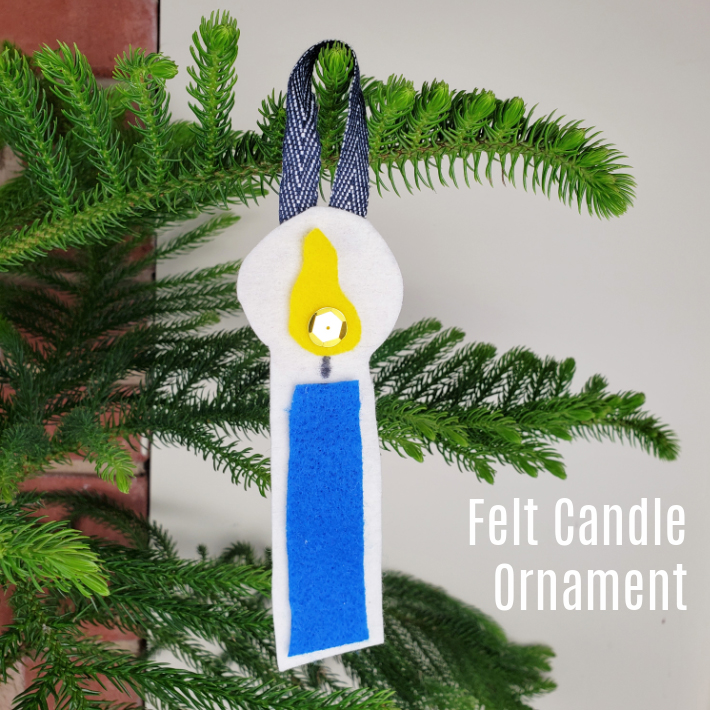
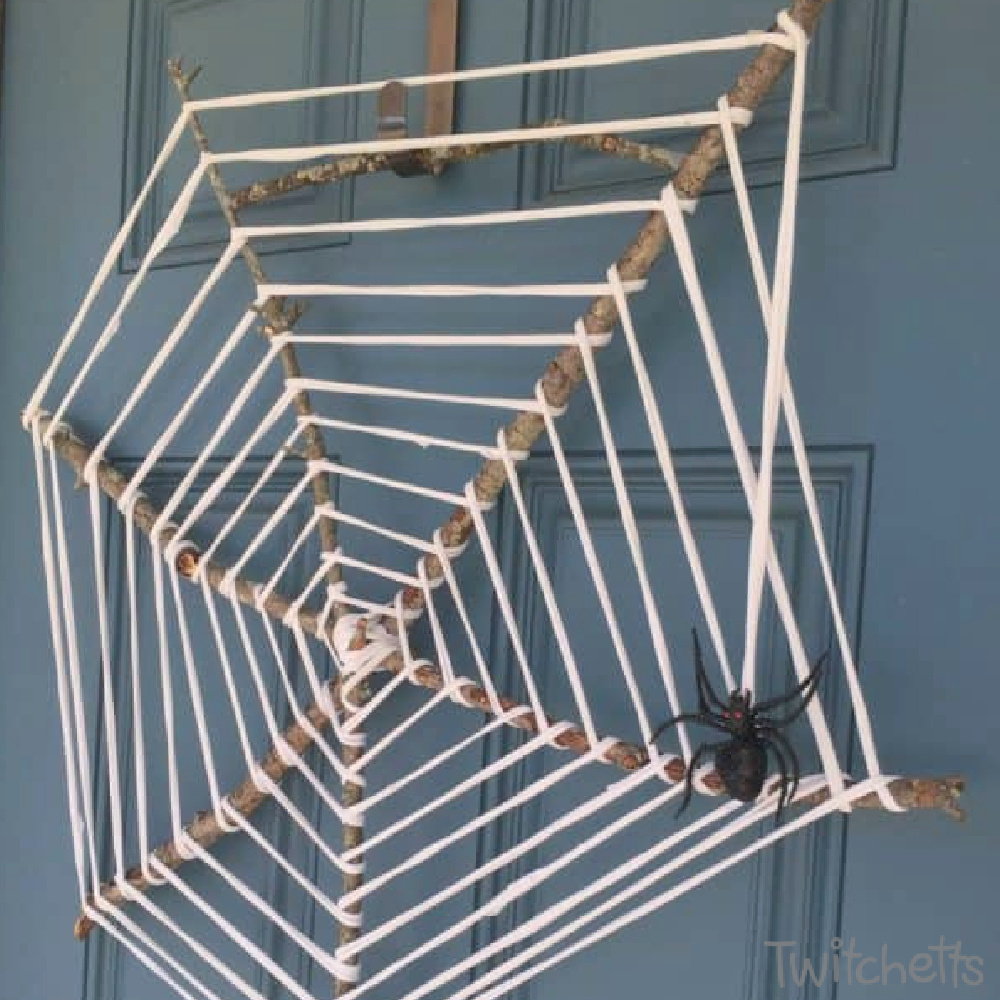
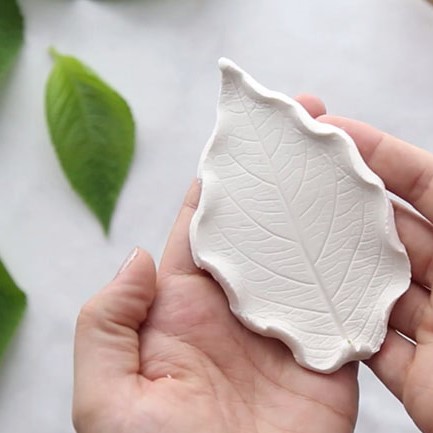
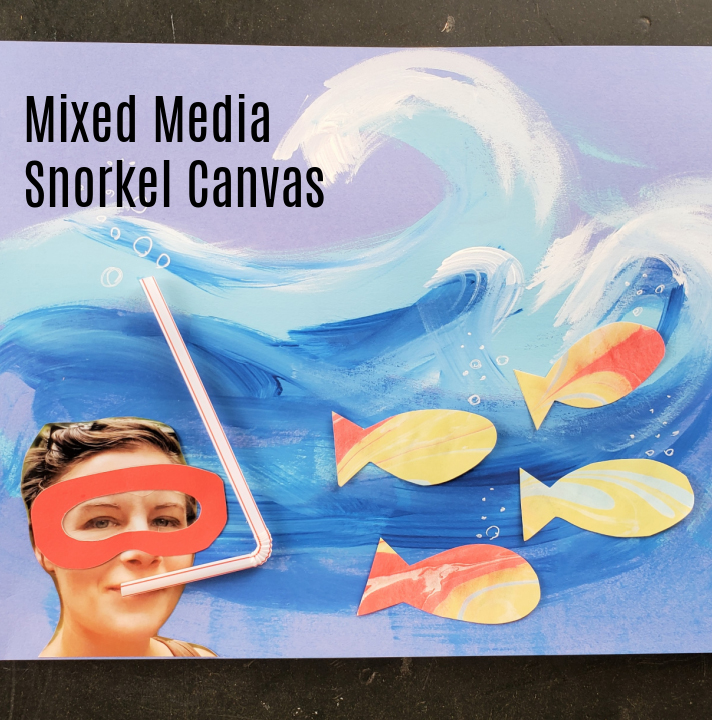
Bring the whole family to our free Drop-In Art classes to create projects to take home, and to draw on the Great Wall of Chalk! Choose one project or several to get your dose of creativity!

Visit Drop-In Art at 2 locations!

Roseglen United Methodist Church Social Hall (722 New Bloomfield Road, Duncannon)
Landis House (67 N. 4th Street, Newport)
Drop-In Art pops up at other locations as announced!

View our calendar for specific upcoming dates.

SCHEDULED PROJECTS